Table of Contents
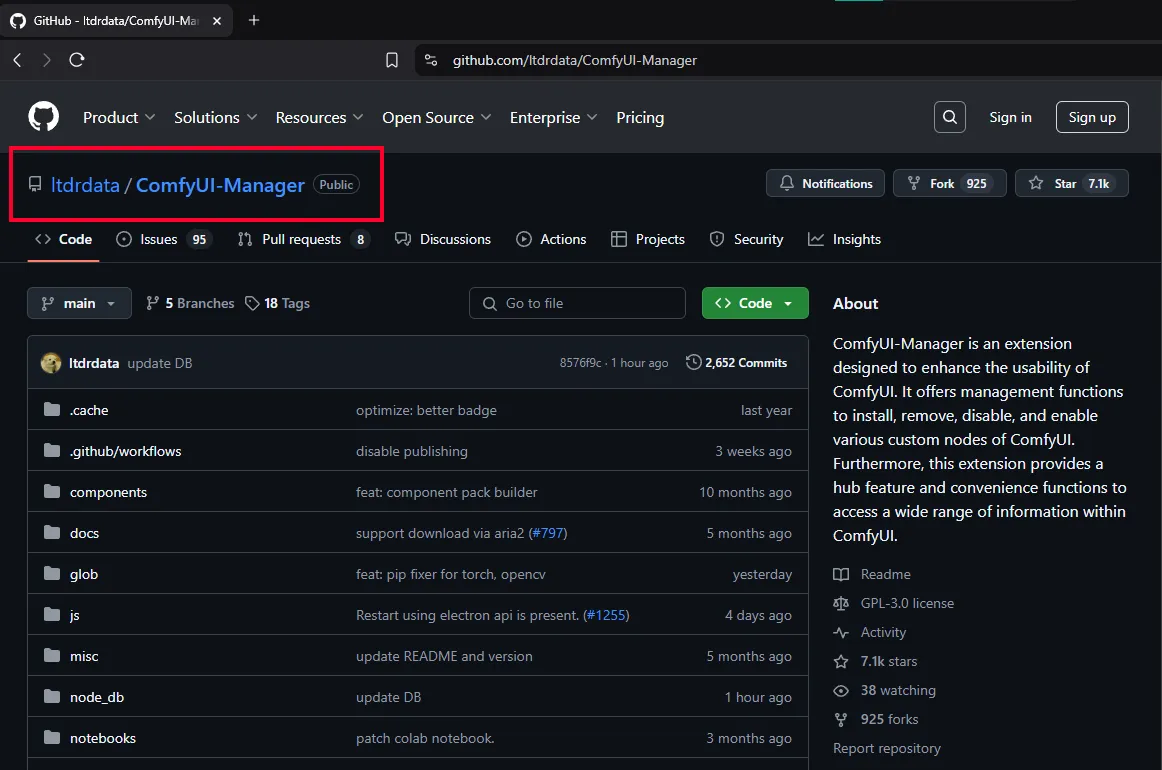
ComfyUI Manager
ComfyUI is a versatile node-based interface for building Stable Diffusion workflows. While it offers significant flexibility for creating and modifying AI workflows, managing various aspects of the system (installing custom nodes, handling dependencies, or organizing complex workflows) can become challenging.
Why Use ComfyUI Manager?
ComfyUI Manager simplifies managing custom nodes and extensions, making your workflow more efficient. It offers:
- Easy Node Management: Install, update, and uninstall nodes from a centralized interface.
- Streamlined Updates: Keep nodes and extensions up-to-date with minimal effort.
- Dependency Handling: Automatically resolve and manage required libraries.
- Organized Workflows: Categorize and search nodes for better clarity.
- Troubleshooting Tools: Detect issues and rollback problematic extensions.
- Time-Saving: Automates repetitive tasks, letting you focus on creative work.
ComfyUI Manager ensures a smoother, more accessible experience for both beginners and experts.
ComfyUI Manager Installation
Go to the following link: https://github.com/ltdrdata/ComfyUI-Manager to download ComfyUI Manager.
Scroll down to the Installation section.
TIPYou can also use this link to go directly to the download section:
https://github.com/ltdrdata/ComfyUI-Manager?tab=readme-ov-file#installation
We will follow Installation Method 2. 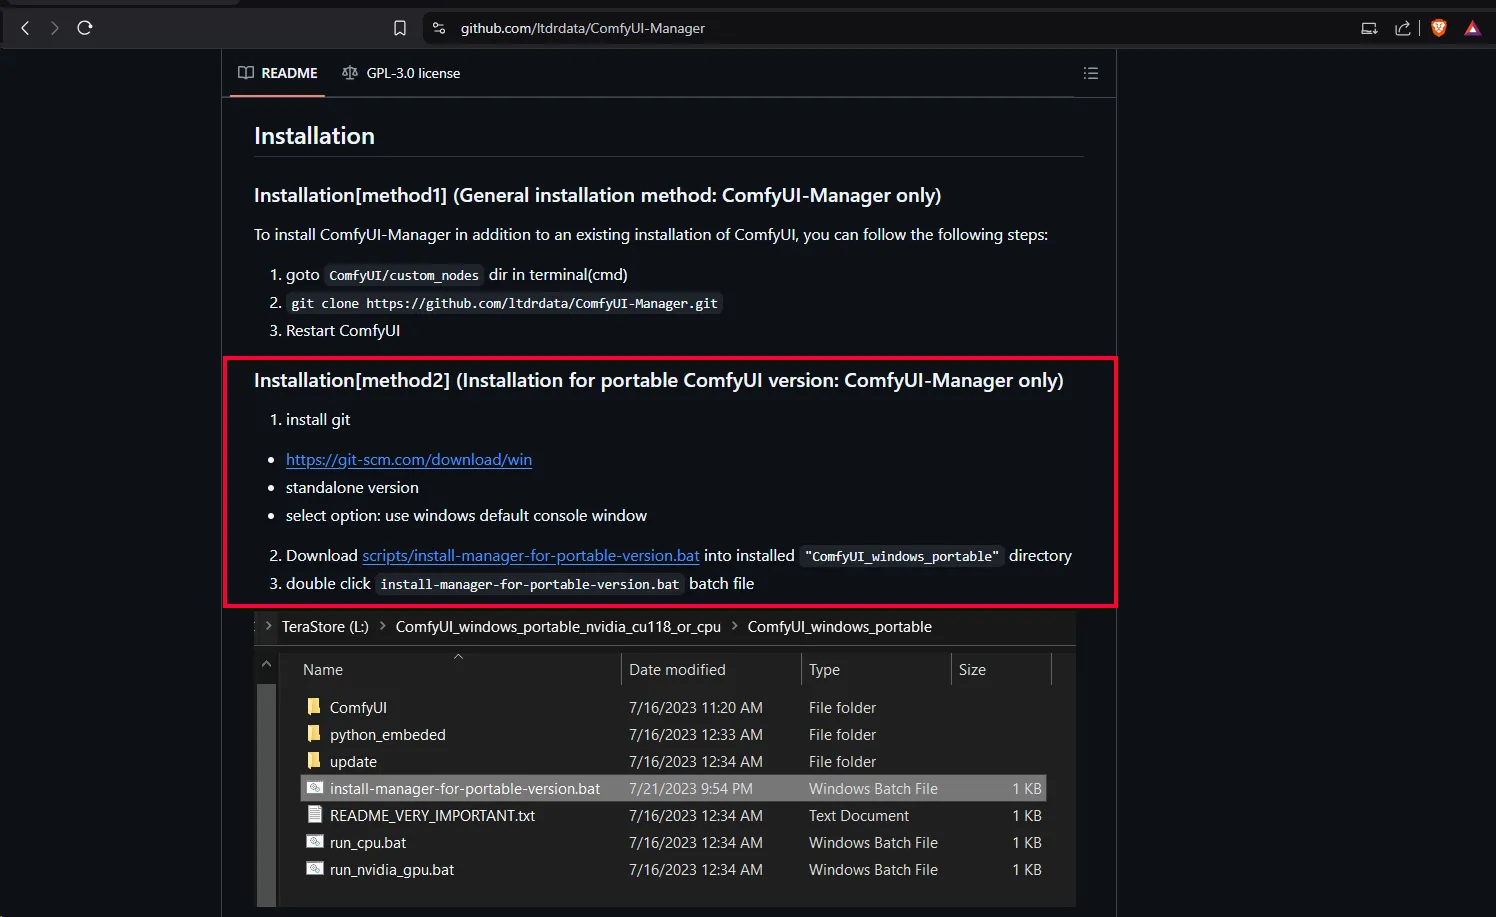
Git Installation
First, we need to install git.
Go to the following link to download it:
https://git-scm.com/downloads/win
Select your operating system architecture (it is likely 64-bit). 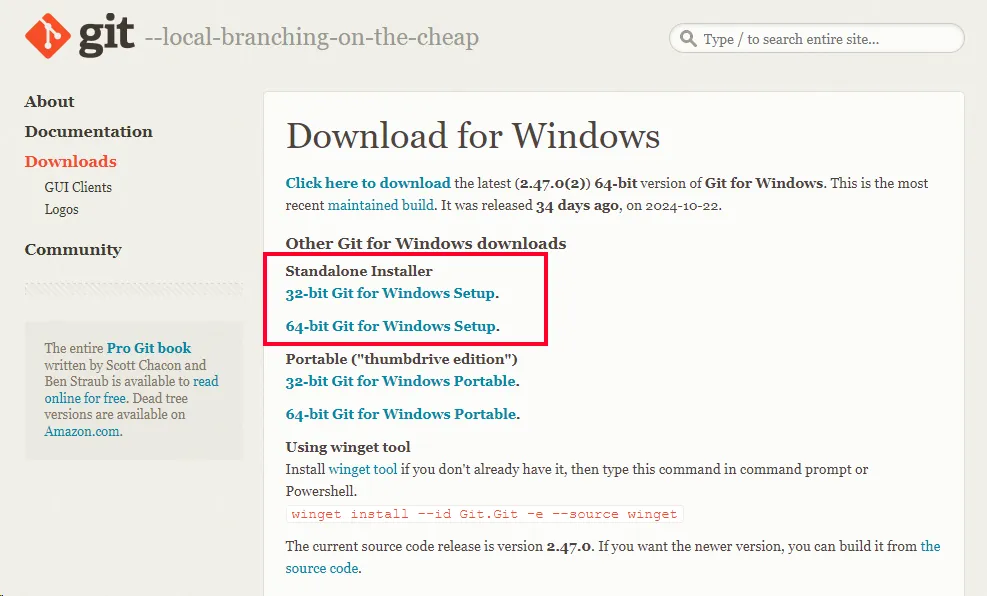
Press Next at every step, EXCEPT at the step shown in the image.
Select the option shown and then press Next to proceed with the installation.
Restart your computer after the installation finishes (not necessary, but recommended).
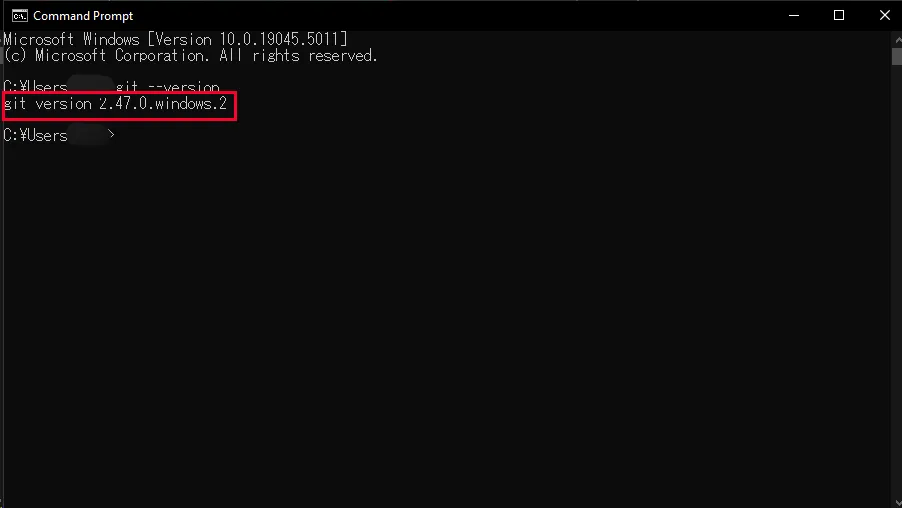
Now verify the Git installation.
In the Windows search bar, type “cmd” and open the Command Prompt.
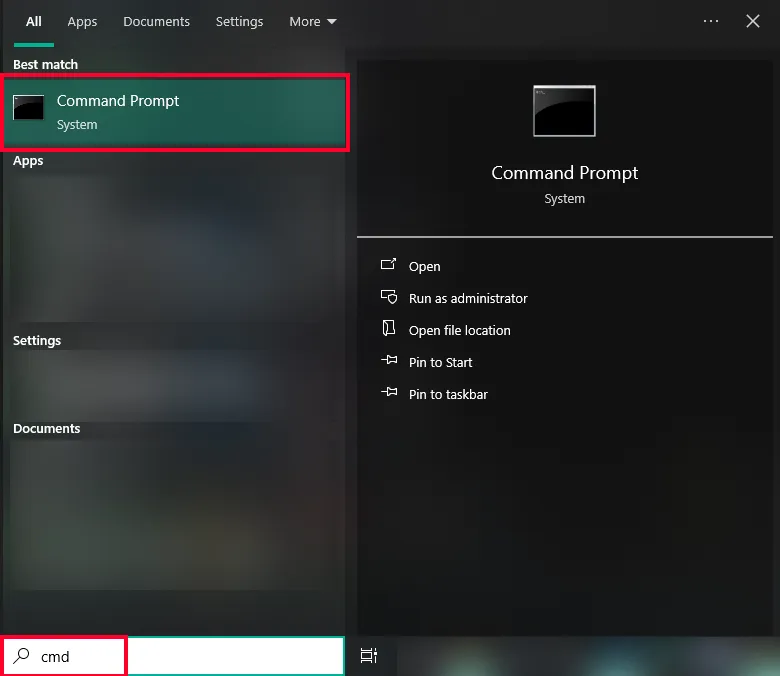
In the Command Prompt, type the following:
git --version
If everything is set up correctly, you will see the installed version.
Installation Script
In Step 2, you will find the script needed to install ComfyUI Manager.
Open the link in a new window. 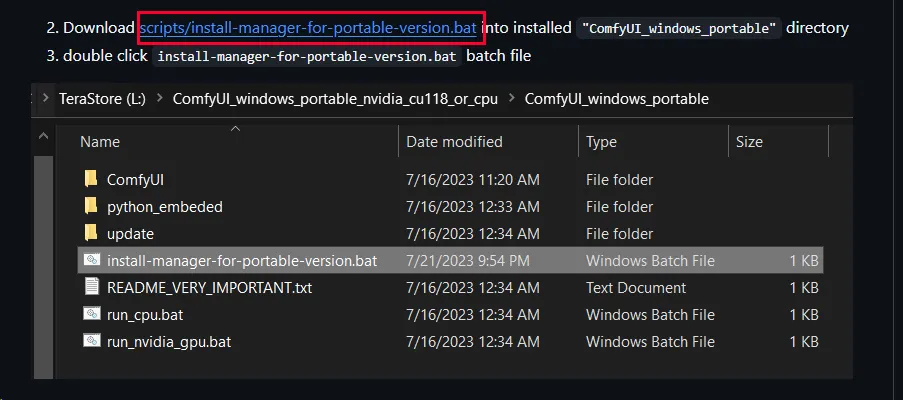
SCRIPTHere is the script in case you can’t open the one on github
.\python_embeded\python.exe -s -m pip install gitpython
.\python_embeded\python.exe -c "import git; git.Repo.clone_from('https://github.com/ltdrdata/ComfyUI-Manager', './ComfyUI/custom_nodes/ComfyUI-Manager')"
Copy the contents of the script.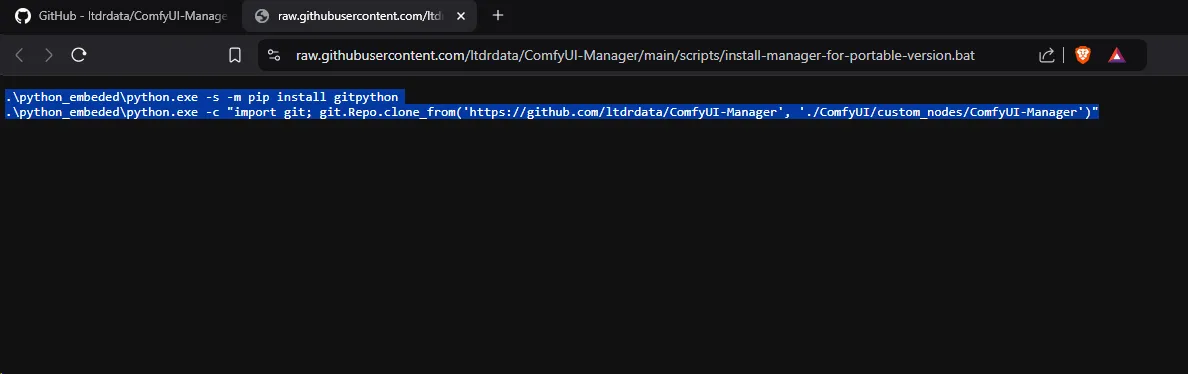
In the ComfyUI folder, create a new text document.
Open it and paste the script content.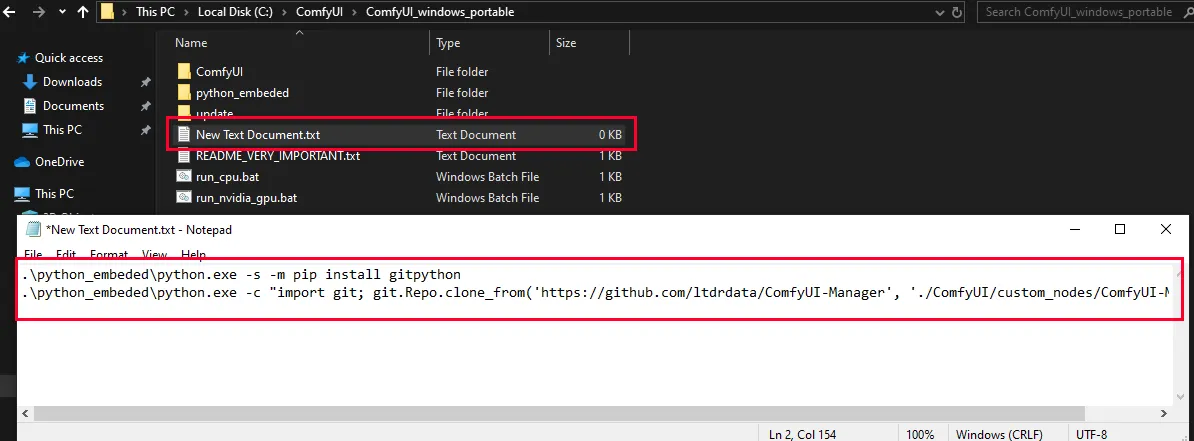
Save it in the same folder (ComfyUI_windows_portable folder).
Rename it to a name of your choice, but ensure the extension ends with .bat 
Open the file you saved to run the script.
A Command Prompt window will open. Don’t worry—it will install ComfyUI Manager and close automatically when the installation is complete.
Now verify the installation of ComfyUI Manager.
Navigate to the following path: ComfyUI_windows_portable/ComfyUI/custom_nodes.
If everything is set up correctly, you will see a ComfyUI-Manager folder in this location.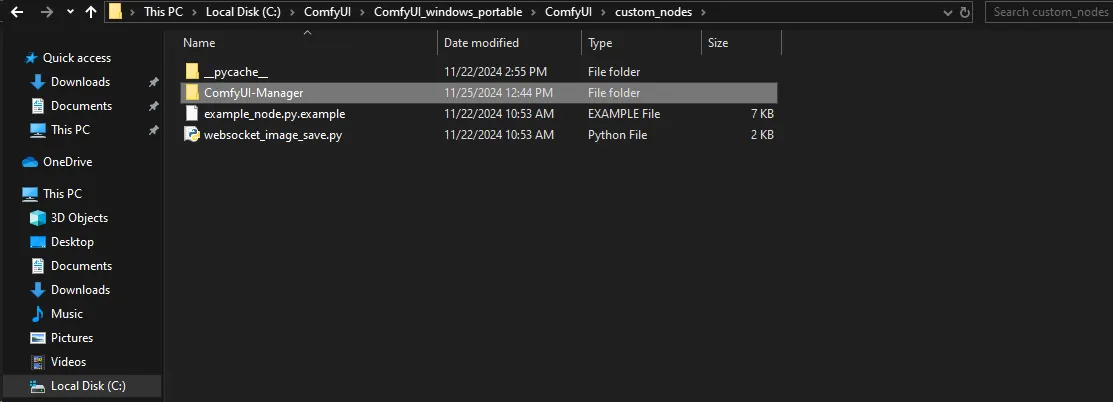
Finally, open your ComfyUI.
At the top, you will see the ComfyUI Manager button.
Click it to access the menu options.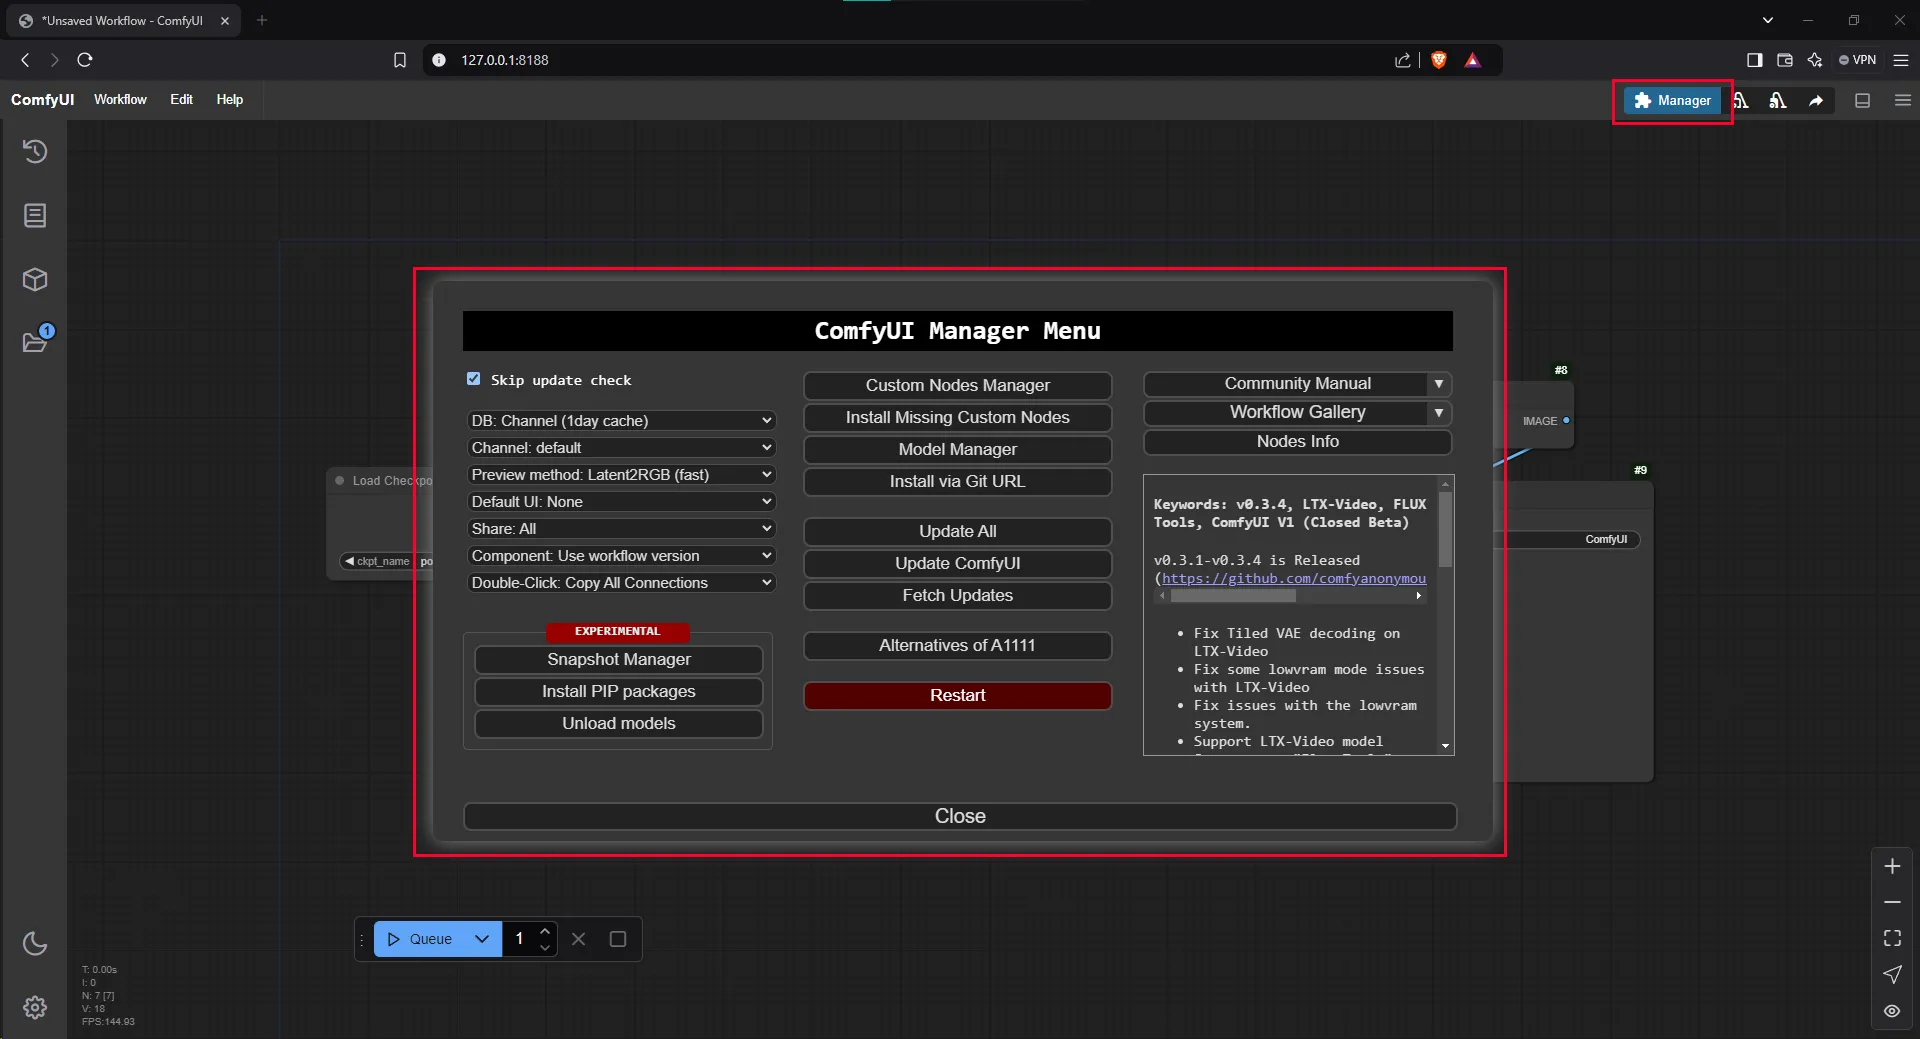
That’s it!
ComfyUI Manager is successfully installed in your ComfyUI.